This guide will walk you through the complete process of reactivating your MLabs plugin license. This is especially useful if you are moving to a new computer or resetting your current setup.
Table of Contents
- Step 1: Access the Customer License Dashboard
- Step 2: Deactivate the Current License
- Step 3: Reactivate in Revit
Step 1: Access the Customer License Dashboard
You can access your license management dashboard using one of the following two methods:
Option 1: Access via the Revit Plugin
In Revit, navigate to the MLabs tab and click on the “License” command. The License Manager dialog will be displayed.
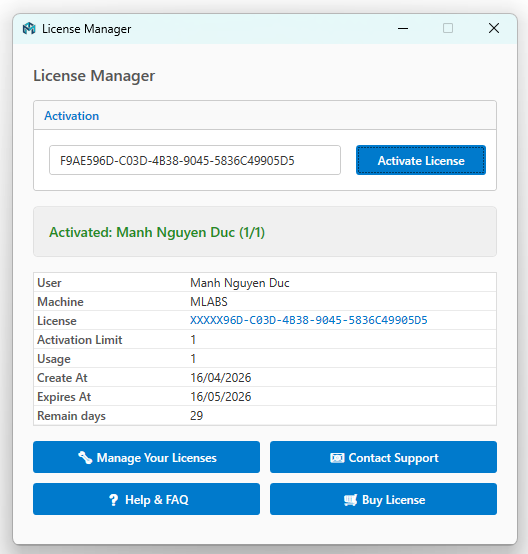
Click the “Manage Your License” button. This will redirect you to your web browser where your dashboard is securely hosted.
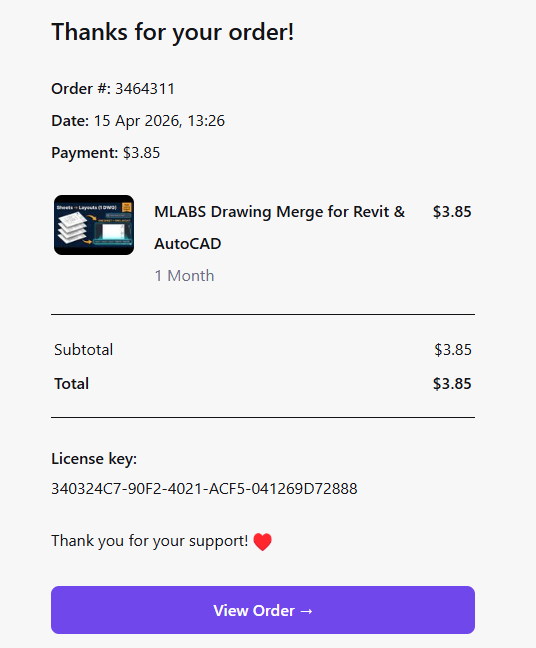
Option 2: Access via your Order Email
Alternatively, you can search your email inbox for your original order confirmation email. Open the email and click the “View Order” button to go directly to your customer dashboard.
Step 2: Deactivate the Current License
Once you are in the Customer License Dashboard, navigate to the “Licenses” tab.
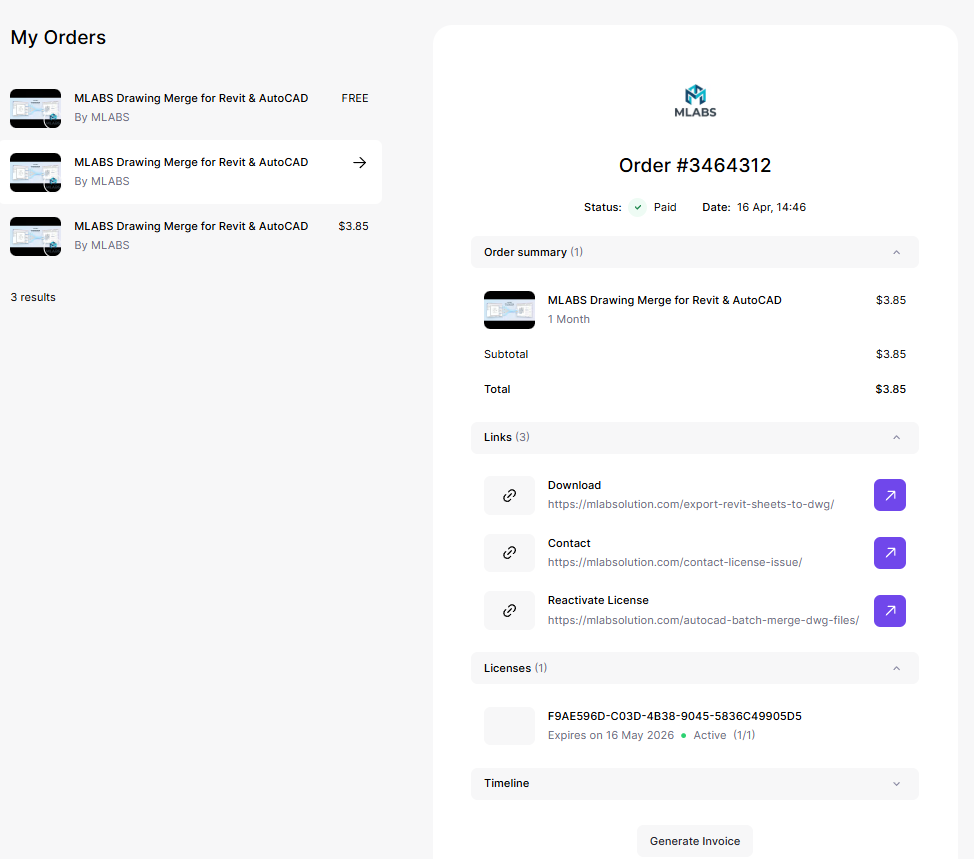
Click directly on your license key string. A “License Details” window will appear, showing all the machines currently using your license.
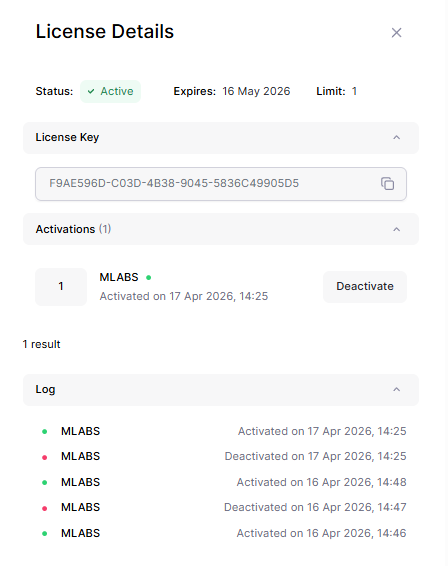
Find the machine or activation instance you want to remove and click the “Deactivate” button. This action will free up a seat for your license so it can be used elsewhere.
Step 3: Reactivate in Revit
Now that the license seat is available, return to Revit. Go to the MLabs tab, click the “License” command, and paste your license key to activate the plugin on your current machine.