How to Use the MLabs AutoCAD Productivity Suite: Features & Instructions
📋 Table of Contents
- 🔹 1. Where to find it in AutoCAD
- 🔹 2. “Merge Drawings” Command – Batch Merge DWG Files
- 🔹 3. “Layout to Model” Command – Batch Export Layouts
- 🔹 4. Create SSM – Quickly Generate a Sheet Set Manager
- 🔹 5. Batch Print – Plot Multiple Drawings in Model Space
- 🔹 6. Raster to OLE – Convert Raster Images
- 🔹 7. “Convert Style” Command – Standardize Your Drawing
- 🔹 8. ToolBox – Quick Commands
1. Where to find it in AutoCAD
Once installed, the plugin is accessible under the MLabs tab in the AutoCAD ribbon, as shown in the image below.

2. “Merge Drawings” Command – Batch Merge DWG Files
Tip: This powerful command helps you merge multiple DWG files with advanced configuration options.
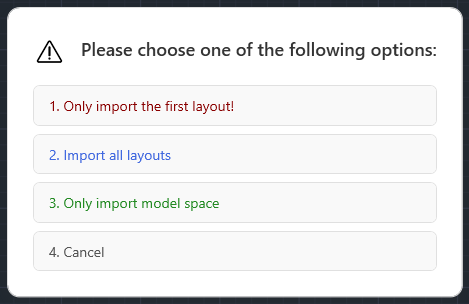
a. Select a merge option:
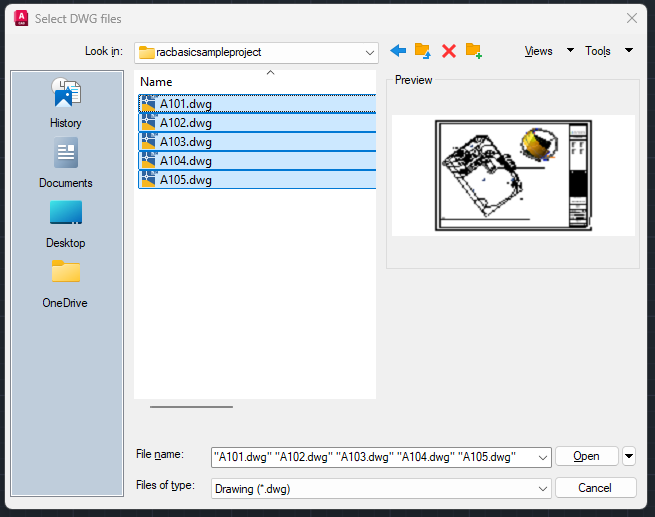
b. Select DWG files to combine:
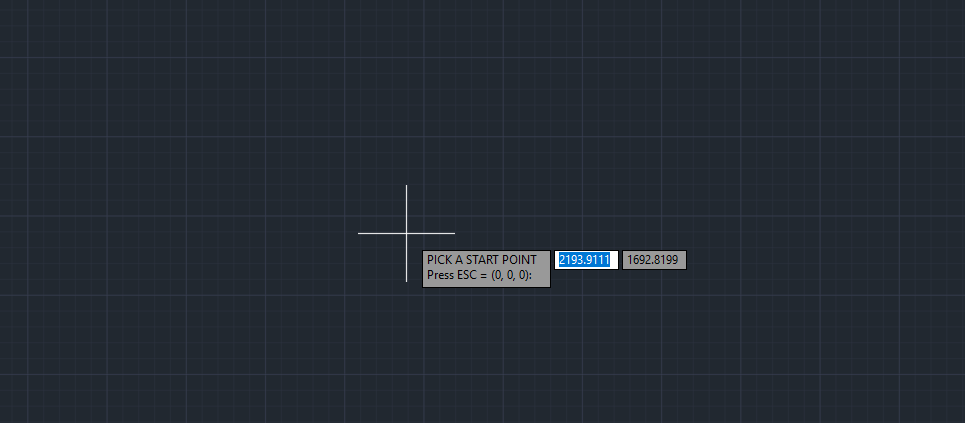
c. Pick an insertion point: (If you press ESC, the default origin point is 0,0,0)
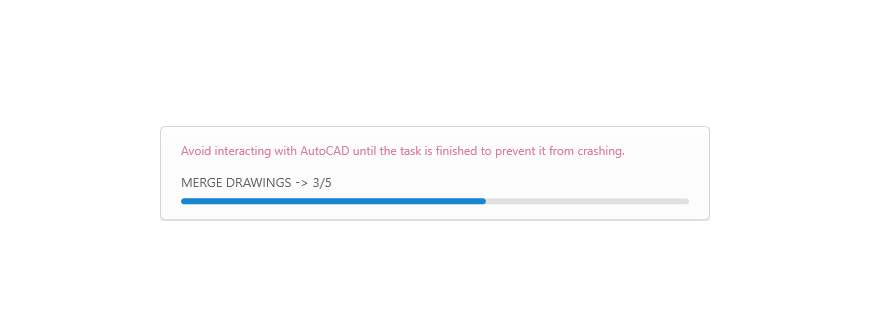
d. Wait for the background process to finish:
e. Check layouts and finish.
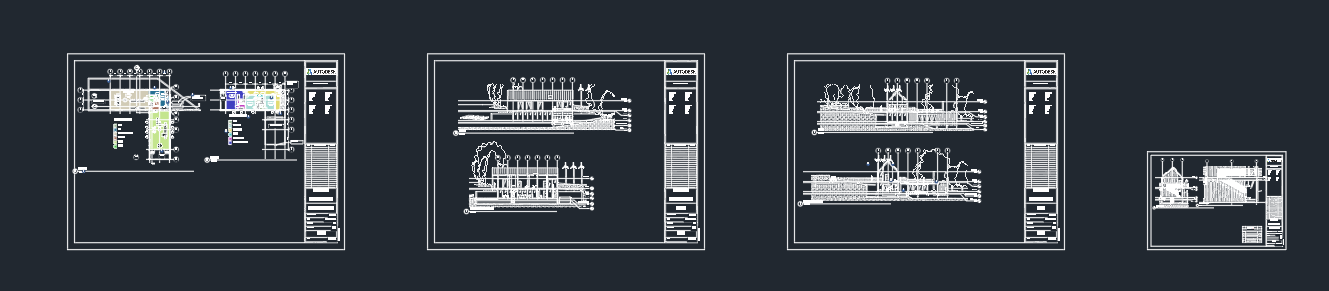
3. “Layout to Model” Command – Batch Export Layouts
Seamlessly convert all your AutoCAD layouts into Model Space and save them as a new DWG file.
a. Converter Settings:
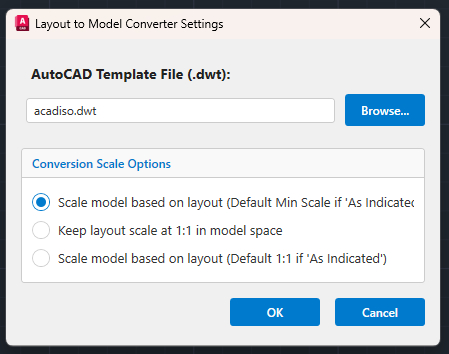
b. AutoCAD Template File (.dwt):
You can leave the default value as acadiso.dwt or acad.dwt, or browse to select your custom template. The plugin will use this specified template to merge your files accurately.
c. Conversion Scale Options:
🔹 Scale model based on layout (Default Min Scale if “As indicated”)
This option scales your drawing based on its original viewport scale. For example, if your layout has a scale of 1:50, it will be scaled up 50 times upon export. As a result, the dimension values in AutoCAD’s Model Space will reflect the real-world measurements.
If your layout contains multiple scale values from different viewports, the exported drawing will be scaled based on the minimum scale available on that specific sheet.
Example: If your layout has 3 viewports with scales of 1:50, 1:100, and 1:200, Revit shows “As indicated”. After exporting, the entire drawing will be scaled up following the 1:200 value (the minimum scale).
🔹 Keep layout scale at 1:1 in model space
By default, the scale in an AutoCAD layout is 1:1. Even if each layout has multiple viewports with their own scales, exporting to model space with this option keeps the overall layout scale unchanged. This means if your viewport scale is 1:50 and a real-world dimension is 5000, measuring it directly in the exported model space will only yield a value of 100.
🔹 Scale model based on layout (Default 1:1 if “As indicated”)
Similar to the first option, this setting scales your drawing based on its designated scale (e.g., scaling up 50 times for a 1:50 drawing to retain real-world dimension values).
However, if your drawing has multiple scale values (“As indicated”), it will default to a 1:1 scale upon export.
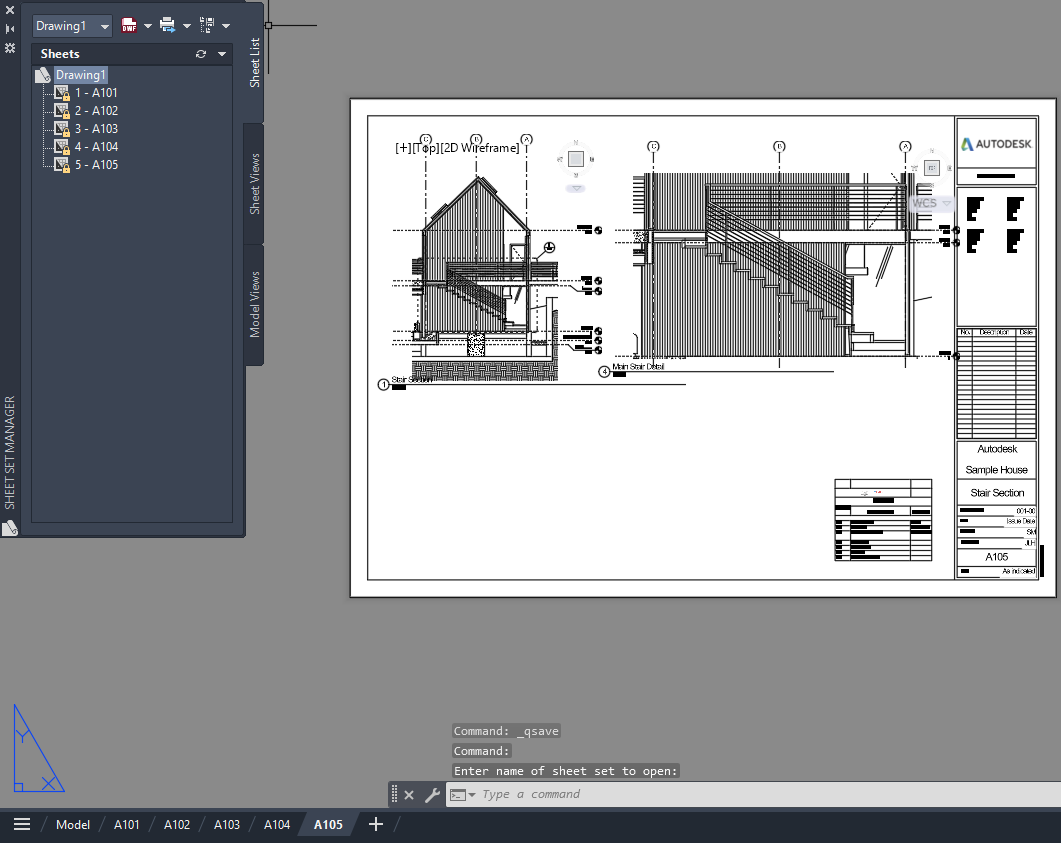
4. Create SSM – Quickly Generate a Sheet Set Manager
Immediately generate a Sheet Set Manager (.dst) for all your active layouts to streamline your drawing organization.
5. Batch Print – Plot Multiple Drawings in Model Space
This command helps you batch print multiple drawings directly from Model Space, which is especially useful after using the “Layout to Model” command.
Simply select any Block Reference or X-Ref. The plugin will identify all valid objects inside the block boundary to print, treating each block as an individual paper sheet.
6. Raster to OLE – Convert Raster Images
a. Global Raster:

Batch convert all images available in the drawing based on your selected settings.
b. Single Raster:
Select a single image and convert it into an OLE object instantly.
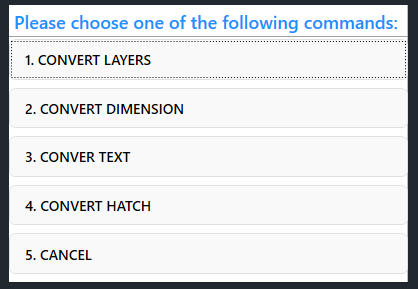
7. “Convert Style” Command – Standardize Your Drawing
Quickly convert and standardize the styles of your layers, dimensions, text, and hatches with a single click.
8. ToolBox – Quick Commands
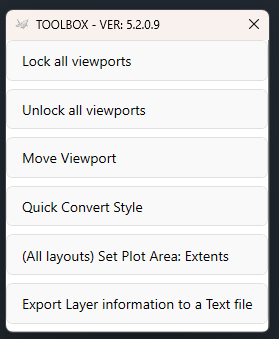
- ✅ Lock all viewports: Prevent accidental zooming inside paper space.
- ✅ Unlock all viewports: Quickly regain access to pan and zoom.
- ✅ Move viewport: Click a viewport and shift its view quickly by picking 2 points in model space.
- ✅ Quick convert style: Operates exactly like the “Convert Style” command, but applies only to pre-selected objects.
- ✅ Set Plot Area to Extents: Automatically set the plot area for all layouts to their extents.
- ✅ Export layer information: Extract layer data (name, color index, etc.) into a convenient text (.txt) file.
AutoCAD MLABS Plugin
Standard Version
Version: 5.5.0.0
Compatibility: AutoCAD 2020+
(Not compatible with AutoCAD LT)
- 🔗 Unified Licensing: One license covers both your Revit and AutoCAD productivity tools.
Ready to boost your productivity?
Supported Languages: English, Portuguese (Brazil), Simplified Chinese, Traditional Chinese, Spanish, French, Arabic, and Vietnamese